Kawasaki Versys Forum banner

Vehicle Down / Tip Over Sensor / Testing/ Work Around

27K views 31 replies 4 participants last post by  onewizard  
#1 ·
Hi guys,

Yesterday my bike (V650 2014) died on me while riding and now it doesn't want to start again. Well it starts but cuts out after a few seconds.

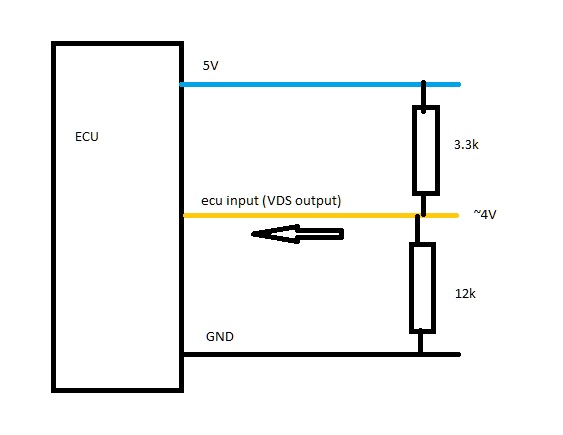
I checked the fueling, ignition coils and battery. All are fine.
The only thing that influences is if I disconnect the vehicle down sensor. My fuel pump cycles longer while the sensor is disconnected and the bike runs 5 seconds when it's disconnected.
When I connect it again, the bike won't start up again.

Is the sensor at fault? Or should I look somewhere else?
 
#2 ·
#3 ·
Thanks for the link, I already read it completely and tested a few things.
The voltage to the sensor is OK, but I have no way of reading the output voltage.

However when the sensor is plugged in, my fuel pump cycles 1 second and then stops when I turn my ignition on. The bike won't start with the sensor connected.

With the sensor disconnected, the fuel pump cycles 3 seconds and then the bike starts for 5 seconds and cuts out.

So should I just get a new sensor?
 
#4 ·
Thanks for the link, I already read it completely and tested a few things.
The voltage to the sensor is OK, but I have no way of reading the output voltage.

However when the sensor is plugged in, my fuel pump cycles 1 second and then stops when I turn my ignition on. The bike won't start with the sensor connected.

With the sensor disconnected, the fuel pump cycles 3 seconds and then the bike starts for 5 seconds and cuts out.

So should I just get a new sensor?
There is no out of circuit test, however I have drawn out what I think the internal connection looks like. Since you have followed 3-59 to 3-60 of the service manual, the BL ( blue) positive and BR/BK ( brown with black tracer ) negative are the input terminals and the center Y/G ( yellow with green tracer) is the output to the ECU.
Take the sensor out of the bike, it mentions not to drop it. Measure the input terminals ( outside terminals ) using a ohm meter, this measurement should be stable irregardless of what position you are holding the sensor.
Next measure from what would be the BL terminal with the sensor vertical to the center what would be the Y/G, note that reading, repeat for the BR/BK to center terminal , record your readings and post.

Since the ECU is looking for a positive 3.55 to 4.45 VDC input, you could try using a 100,000 ohm resistor between the BL and Y/G , try starting the bike and see if it runs for more than 5 seconds ( FYI you do this at your own risk and if it works you need to replace the sensor).
 
#5 ·
There is no out of circuit test, however I have drawn out what I think the internal connection looks like. Since you have followed 3-59 to 3-60 of the service manual, the BL ( blue) positive and BR/BK ( brown with black tracer ) negative are the input terminals and the center Y/G ( yellow with green tracer) is the output to the ECU.
Take the sensor out of the bike, it mentions not to drop it. Measure the input terminals ( outside terminals ) using a ohm meter, this measurement should be stable irregardless of what position you are holding the sensor.
Next measure from what would be the BL terminal with the sensor vertical to the center what would be the Y/G, note that reading, repeat for the BR/BK to center terminal , record your readings and post.

Since the ECU is looking for a positive 3.55 to 4.45 VDC input, you could try using a 100,000 ohm resistor between the BL and Y/G , try starting the bike and see if it runs for more than 5 seconds ( FYI you do this at your own risk and if it works you need to replace the sensor).
Thanks for the help man!

These are my readings, tested with an Ohm meter on 20k setting:
* input terminals together: 16.03 stable
* BL terminal to Y/G terminal: 13.03 , sometimes 13.02
* BR terminal to Y/G terminal: 3.02 , sometimes 3.01
 
#6 ·
Thanks for the help man!

These are my readings, tested with an Ohm meter on 20k setting:
* input terminals together: 16.03 stable
* BL terminal to Y/G terminal: 13.03 , sometimes 13.02
* BR terminal to Y/G terminal: 3.02 , sometimes 3.01
If all those readings are vertical, 3.02 K ohms ? that is 3,002 Ohms. That is what the BL to Y/G should be when vertical, did you try lightly shaking side to side and retesting vertical ? At this point it appears NFG ( not for good >:))
 
#7 ·
If all those readings are vertical, 3.02 K ohms ? that is 3,002 Ohms. That is what the BL to Y/G should be when vertical, did you try lightly shaking side to side and retesting vertical ? At this point it appears NFG ( not for good >:))
Sorry I mistyped. I switched BL and BR.

So readings are:

* BRterminal to Y/G terminal: 13.03 , sometimes 13.02
* BL terminal to Y/G terminal: 3.02 , sometimes 3.01

Sorry!
 
#8 ·
Sorry I mistyped. I switched BL and BR.

So readings are:

* BRterminal to Y/G terminal: 13.03 , sometimes 13.02
* BL terminal to Y/G terminal: 3.02 , sometimes 3.01

Sorry!
The manual calls for a special pin probe, I have used straight pins. Years ago there was a piecing probe made by Fluke, not something I encourage but two ways of doing this, one to take a straight pin and bend it, trying to slip into those terminals and follow the manual. The second way would be to take a straight pin or needle and pierce the Y/G wire ( about 1 inch from the connector , tape up later, if concerned use silicone and tape), connect your negative to battery negative, positive to Y/G pin , key on and note voltage.

One other thing, you may need to remove the seat/ tank mounting bracket and remove & check grounds, the ECU doesn't have a wired negative ground from the battery, but depends on the steel frame, many, including myself have found a corroded connection here on my 07, this is on the foot brake side of the bike just below and to the rear of the seat/ tank mounting bracket.

 
#10 ·
The manual calls for a special pin probe, I have used straight pins. Years ago there was a piecing probe made by Fluke, not something I encourage but two ways of doing this, one to take a straight pin and bend it, trying to slip into those terminals and follow the manual. The second way would be to take a straight pin or needle and pierce the Y/G wire ( about 1 inch from the connector , tape up later, if concerned use silicone and tape), connect your negative to battery negative, positive to Y/G pin , key on and note voltage.

One other thing, you may need to remove the seat/ tank mounting bracket and remove & check grounds, the ECU doesn't have a wired negative ground from the battery, but depends on the steel frame, many, including myself have found a corroded connection here on my 07, this is on the foot brake side of the bike just below and to the rear of the seat/ tank mounting bracket.

I'll try straight pin reading tonight. I'll keep you posted.
 
#11 ·
The manual calls for a special pin probe, I have used straight pins. Years ago there was a piecing probe made by Fluke, not something I encourage but two ways of doing this, one to take a straight pin and bend it, trying to slip into those terminals and follow the manual. The second way would be to take a straight pin or needle and pierce the Y/G wire ( about 1 inch from the connector , tape up later, if concerned use silicone and tape), connect your negative to battery negative, positive to Y/G pin , key on and note voltage.

One other thing, you may need to remove the seat/ tank mounting bracket and remove & check grounds, the ECU doesn't have a wired negative ground from the battery, but depends on the steel frame, many, including myself have found a corroded connection here on my 07, this is on the foot brake side of the bike just below and to the rear of the seat/ tank mounting bracket.

Just pierced Y/G wire with sensor connected. These are the voltages:
* Sensor tilted: 1.043 volt (should be 0.65 - 1.35)
* Sensor dead vertical: 1.04 volt (should be 3.55 - 4.45)

So I guess it's time to order a new sensor?
 
#12 ·
Vehicle Down Sensor / Doing it's Job

Just pierced Y/G wire with sensor connected. These are the voltages:
* Sensor tilted: 1.043 volt (should be 0.65 - 1.35)
* Sensor dead vertical: 1.04 volt (should be 3.55 - 4.45)

So I guess it's time to order a new sensor?
Looks like the magic smoke escaped, thanks for going the extra mile. I would still check the ECU grounds, they are 18 to 20 gauge wires, approximately 2 on your model year, there may be more, I have no idea why Kawasaki uses the steel frame to power these connections. And judging by your findings you need a new one.:surprise:


FYI the ground on my 2015 even new was poorly done at the seat. I scotch brited and then used a copper based anti oxide coating that I have used for years in harsh environments ( gravel pit crushing plant , any connections , including fittings that don't get coated are like welded together in 3 months , the stuff I use is a T&B product called Kopr coat https://www.specialized.net/cp8-tb-thomas-betts-kopr-shield-compound-8-oz.html Jet-Lube, LLC. | Kopr-Kote Industrial - High Temp Anti-Sieze)
 
#14 ·
Looks like the magic smoke escaped, thanks for going the extra mile. I would still check the ECU grounds, they are 18 to 20 gauge wires, approximately 2 on your model year, there may be more, I have no idea why Kawasaki uses the steel frame to power these connections. And judging by your findings you need a new one./forums/images/KawasakiVersysForum_2015/smilies/tango_face_surprise.png


FYI the ground on my 2015 even new was poorly done at the seat. I scotch brited and then used a copper based anti oxide coating that I have used for years in harsh environments ( gravel pit crushing plant , any connections , including fittings that don't get coated are like welded together in 3 months , the stuff I use is a T&B product called Kopr coat https://www.specialized.net/cp8-tb-thomas-betts-kopr-shield-compound-8-oz.html Jet-Lube, LLC. | Kopr-Kote Industrial - High Temp Anti-Sieze)
Is the Ecu frame ground in the first picture circled in red? Of should it be somewhere in the second picture?

Image

Image


Thanks!
 
#15 ·
ECU Grounds

Is the Ecu frame ground in the first picture circled in red? Of should it be somewhere in the second picture?


Image


Thanks!
Looking at the photo, right side, you have the mounting bolts for the seat / tank bracket removed, just rear of the mounting bolt hole is a clear hole, if you look through that hole you should see the wires. Only way of accessing it is to use a piece of wood on either side of the rear of the gas tank, and remove the bracket, PITA to get at.

One other test I failed to have you make was to measure between the Blue and brown with black tracer while connected to the sensor, there is a remote chance the 5 volt power supply of the ECU has failed. I thought you measured the VDC of the input, however going back in the posts I couldn't find that, it should be around 5VDC while connected to the sensor. I have seen it where open circuit it shows 5 volts but under load much less.( connected to sensor it is a fixed value, far below 5 volts)
The sensor acts as a voltage divider, since whatever comes into the sensor as supply volts ,the input voltage will be equal to BR/BK & Y/G plus BL & Y/G . That is if you measured a input of 5 volts, with the sensor vertical you should get say 4 VDC at Y/G WRG ( with reference to ground) and 1 VDC from BL to Y/G. There could be a blocking diode in the output and also a fixed resistance . Since it is roughly 0.7 VDC in the manual difference, my guess is a blocking diode.
 
#16 ·
Looking at the photo, right side, you have the mounting bolts for the seat / tank bracket removed, just rear of the mounting bolt hole is a clear hole, if you look through that hole you should see the wires. Only way of accessing it is to use a piece of wood on either side of the rear of the gas tank, and remove the bracket, PITA to get at.

One other test I failed to have you make was to measure between the Blue and brown with black tracer while connected to the sensor, there is a remote chance the 5 volt power supply of the ECU has failed. I thought you measured the VDC of the input, however going back in the posts I couldn't find that, it should be around 5VDC while connected to the sensor. I have seen it where open circuit it shows 5 volts but under load much less.( connected to sensor it is a fixed value, far below 5 volts)
The sensor acts as a voltage divider, since whatever comes into the sensor as supply volts ,the input voltage will be equal to BR/BK & Y/G plus BL & Y/G . That is if you measured a input of 5 volts, with the sensor vertical you should get say 4 VDC at Y/G WRG ( with reference to ground) and 1 VDC from BL to Y/G. There could be a blocking diode in the output and also a fixed resistance . Since it is roughly 0.7 VDC in the manual difference, my guess is a blocking diode.
Onewizard, you truly are a wizard.

Just got a new sensor from the dealer and the bike is up and running again! 1000 times thanks for the help! :grin2::grin2::grin2:
 
#17 ·
Maybe he'll want to keep it intact as a souvenir.
When you are done replacing it, PLEASE cut open the old one and show us how it's made with many pictures!
I opened it up and here are the pictures:

This is the bottom part of the sensor when you open it up. The metal 'wheel' is able to pivot as the bike leans over.

Image

Image


This is the inside of the top part of the sensor. It features the circuit board and a on the other side there are the 3 connectors.

Image


Side view of the top part:

Image


Here you can see what happens when the sensor leans over.

Image


Then I took the 'wheel' out for a closer look. The bar in the middle is not fixed, it can slide out.

Image


In the last picture I pulled the pin out of the 'wheel'. The two white rings are plastic spacers.

Image


Hopefully you guys appreciate the pictures :laugh:
 
#18 ·
That's great. I think there is no resistor/tension divider here. That's a great little mechanism to prevent wear and poor shock resistance otherwise found in variable resistors.

It looks like a hall effect sensor. The dented wheel would move in front of the tiny square chip (hall sensor with transistor I guess) and turn the base on, shorting to 1v instead of the 4v.

Still seems possible to hack a "always upright" hard wired version with a 3.3kohms + 12kohms...
Unless the chip actually sends a waveform like in garage door trip light sensors, to avoid unsecure hacks...
Someone would have to put an oscilloscope to see it in action, if the hard tension divider doesn't work.

Seeing a chip there make me think that it is not simple DC electronics.
 
#19 ·
That's great. I think there is no resistor/tension divider here. That's a great little mechanism to prevent wear and poor shock resistance otherwise found in variable resistors.

It looks like a hall effect sensor. The dented wheel would move in front of the tiny square chip (hall sensor with transistor I guess) and turn the base on, shorting to 1v instead of the 4v.

Still seems possible to hack a "always upright" hard wired version with a 3.3kohms + 12kohms...
Unless the chip actually sends a waveform like in garage door trip light sensors, to avoid unsecure hacks...
Someone would have to put an oscilloscope to see it in action, if the hard tension divider doesn't work.

Seeing a chip there make me think that it is not simple DC electronics.
I would check with a polarized magnet and a small steel screw driver, locate 1 or more magnets, identify if polarized ( one attracts one repels if 2) . Agreed, much more complex than resistors, if no magnet it could also be a proximity sensor.
 
#20 ·
I would check with a polarized magnet and a small steel screw driver, locate 1 or more magnets, identify if polarized ( one attracts one repels if 2) . Agreed, much more complex than resistors, if no magnet it could also be a proximity sensor.
I grabbed a magnet and started testing and indeed there are magnets inside. I tried to mark them on this picture, I hope it's clear what I mean.

Image


Thanks again onewizard!
 
#21 ·
About the resistive hack:

I would try a 3.3kohms (orange orange red) between the 5v and the center pin, and a 12kohms (brown red orange) between the center pin and ground pin. If this works, it will go in my toolkit with the spare fuses, right now!

(if it works, any 1:4 relation between resistors would probably work in the vicinity, like
1.2 kohms + 4.7 kohms,
or 1.5 kohms + 5.6 kohms,
or 3.9 kohms + 15 kohms,
or 4.7 kohms + 18 kohms.
(I'm giving standardized 10% resistor values).

But like I wrote, I suspect the manual tells to test for ~4 volts but wouldn't bother explain why it's 4V on a DC multimeter, when it could easily be a square wave of 5V with a 80% duty cycle....

So, measuring with the AC voltmeter might show something interesting without requiring an oscilloscope. If you pick up any AC voltage when upright, the resistor hack likely won't work.
 
#22 ·
Guys, I was too curious, so I went testing. Here are some results:

test1: replace vehicle down sensor by 3.3 kOhms + 12 kOhms hack
bike starts and doesn't stop. While bike is idling, I yank out the resistors: bike doesn't stop!

test2: unplugged the vehicle down sensor (VDS)
bike starts just fine and doesn't stop.

WTF?
I suspect this is because I was in neutral? Well, if I recall the long post, the bike should shut down even in neutral...
My bike is gen3 (2015).
I turn off ignition between every test.
My hypothesis is that upon ignition, if the VDS is not present, it is ignored? Then that's an easy fix on the road! (Just disconnect and move on)
 
#23 ·
I think your test is flawed, also explain what the 3.3 and 12K resistors were connected to, I assume the 12 K was BL to Y/G and the 3.3 was Y/G to BR/BK
I did explain in post 24. If you want 4V out of 5V, the higher resistor need to be on the ground side. So exactly the opposite of what you wrote. 3.3kohms should be on the +5v (blue) side and center (yellow). To the casual reader, if you don't know what a tension divider is, stay away from electronics and the hacks discussed here. LOL!


Keep in mind there is a scan time allowed ( 3 to 5 seconds), also in testing bypassed does a error code get sent and display on the gauges? Will it run indefinitely in the bypassed mode?
Yeah, I gave it a fair 5+ seconds. Every test. With ignition off-on every test. I have not looked for "error codes" of any kind. Bike just ran fine (in neutral) in all cases. I suspect the ECU expects low vs high voltage (binary) and it may have a pull up resistor, so when disconnected, it shows as high voltage, thus thinks the bike is "upright". It makes sense that engineers would design to tolerate circuit failures like a broken cable or connector.

I intend to remove the dash upper cowling and go ride with the VDS disconnected, reconnecting if it fails/ Maybe tomorrow. Someone else can report results too (scientific method).
 
#24 ·
I did explain in post 24. If you want 4V out of 5V, the higher resistor need to be on the ground side. So exactly the opposite of what you wrote. 3.3kohms should be on the +5v (blue) side and center (yellow). To the casual reader, if you don't know what a tension divider is, stay away from electronics and the hacks discussed here. LOL!


Yeah, I gave it a fair 5+ seconds. Every test. With ignition off-on every test. I have not looked for "error codes" of any kind. Bike just ran fine (in neutral) in all cases. I suspect the ECU expects low vs high voltage (binary) and it may have a pull up resistor, so when disconnected, it shows as high voltage, thus thinks the bike is "upright". It makes sense that engineers would design to tolerate circuit failures like a broken cable or connector.

I intend to remove the dash upper cowling and go ride with the VDS disconnected, reconnecting if it fails/ Maybe tomorrow. Someone else can report results too (scientific method).
See post 26 , As I think I stuck my foot in my mouth here. Yes I make mistakes too :eek::rolleyes:

Voltage is equal to current times resistance. Supply positive is BL ( @5VDC) supply negative is BR/BK . Output is Y/G Total circuit R is 12K +3K = 15 K . Current is volts divided by resistance 5 VDC /15k = 0.00033 amps

Volts across 12 k resistor is 0.00033 X 12k = 3.96 VDC.
[/B]

To go one step further you could measure the current through the Y/G wire to the ECU. Take that current and calculate the resistance required to produce a 1 volt drop , say it was 1.3 milliamp current ( R= E over I) = ( 1VDC divided by 0.0013 amp) = a 769 ohm resistor @ 1/4 watt or less. Therefore you would only need one resistor. Big difference between a voltage divider and something to produce a series voltage drop on a fixed load.
 
#25 ·
Voltage is equal to current times resistance. Supply positive is BL ( @5VDC) supply negative is BR/BK . Output is Y/G Total circuit R is 12K +3K = 15 K . Current is volts divided by resistance 5 VDC /15k = 0.00033 amps

Volts across 12 k resistor is 0.00033 X 12k = 3.96 VDC. You do the math, and it is called a voltage divider, when you correct me make sure I have made a mistake first.
Hi onewizard, I don't know how the discussion turned this way but I feel some anger coming my way. I trying to help. I have an electrical engineering degree so I think I thought I could actually help. I can move along if you really prefer so.

This below is what I tried. I simply pointed out that you indicated to put the 12kohms on the blue side which is wrong. I also assume the ECU input (yellow) is high impedance and doesn't draw any significant current but merely detects voltage, as any modern microcontroller input would. I tried to respect the hinted approximate 16kohms in other posts as a starting point.

Anyway. Here is my diagram. I'll shut up now.

Image
 
#26 ·
Colur coded and Accurate

Hi onewizard, I don't know how the discussion turned this way but I feel some anger coming my way. I trying to help. I have an electrical engineering degree so I think I thought I could actually help. I can move along if you really prefer so.

This below is what I tried. I simply pointed out that you indicated to put the 12kohms on the blue side which is wrong. I also assume the ECU input (yellow) is high impedance and doesn't draw any significant current but merely detects voltage, as any modern microcontroller input would. I tried to respect the hinted approximate 16kohms in other posts as a starting point.

Anyway. Here is my diagram. I'll shut up now.

Image
Well when I screw up , I do a good job of it, eventually I will edit out my mistakes in the previous post. Many times when I had problems on complex circuits I would draw it out, this time I figured I was smart enough and my memory was good enough that I could do it in my head. So in the drawing, measuring across
the 12 K resistor will give approx. 4 VDC, the key is that the input to the ECU must be positive with respect to ground, therefore one side of that 12K resistor must be connected to ground.

So I was 100% wrong :sorry:

Also :thanx: for taking the trouble to provide a accurate drawing.